Last night I canned my first peaches! There are several steps involved (many of which can be done at the same time, depending on how many pans you have), but each step is very simple. This is a great way to eat delicious peaches all year long!
 |
| This is the pot I used to sanitize the jars. |
Step One: Sanitize the jars. You can either wash them in your dishwasher on the sanitize cycle or sanitize them in a large pot of boiling water.
Fill the pot with water and bring to a boil. Add the jars and lids carefully once the water is boiling. Boil them for ten minutes and use a slotted spoon to remove them.
Step Two: Peel, pit, and chop peaches. As I mentioned in my last article, the best way to peel the peaches is to put them into boiling water for thirty seconds or less and then into a bowl with water and ice for a couple of minutes.
 |
| Peaches in boiling water |
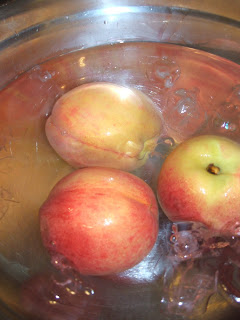 |
| Peaches in ice bath |
 |
| The skins peel right off. |
Make sure to save the skins in the fridge if you are interested in making peach honey (which I will make once I have enough skins. You need to have several cups of skins to make it.
To pit the peaches, use a knife to cut all of the way around the peach and then rock the knife back and forth in several places until you are able to pull it open. Then pull out the pit in the middle. I found that this works the best.
Chop the peaches and sprinkle with lemon or lime juice to keep them from browning.
Step Three: Prepare the syrup
You may choose to make light, medium, or heavy syrup. You will need six cups of water and will add two cups of sugar for light, three cups for medium, and four cups for heavy. The light syrup was perfect for me.
As you start boiling the water, add the sugar gradually and continue stirring until dissolved. Bring it to a boil and then simmer for about seven to ten minutes.
Step Four: Add the peaches to the syrup and simmer for five minutes.
Step Five: Can Peaches
Use a slotted spoon to put just the peaches into the jar and then add the syrup. Use a spatula or knife to remove any air bubbles from the jars. You can add just a little bit more lemon or lime juice to prevent browning.
Wipe the top of the jar, center the lid, and then put on the band. Tighten completely.
Step Six: Seal Jars
Place jars in the large pot that was used to sanitize the jars earlier. Fill the pot with enough water to cover the jars by several inches. Bring the water to a boil and then boil for ten minutes. Then turn off the heat and let the jars sit for five minutes. Remove the jars from the water bath and allow the jars to cool.
After the jars have cooled, store the jars in a cool, dark place. Enjoy! They will stay good for 12-18 months (if they can be resisted for that long).
For additional information,
click here.


